How to Test a Full React App Using Nothing But Storybook
In my previous article about how to test everything in your Redux app with Jest I’ve discussed how you can use snapshot testing to test Redux actions, reducers, views and side effects.
We’ll divide this subject into a two-part series:
- Part 1 (you’re reading it!): Testing theory, what changed in the world, and how to use storybook to cover your bases with Storyshots, Puppeteer, and Storybook-Cartesian
- Part 2 (follow this publication to be notified when its out!): Applying the same practices to multi-browser testing with Storybook-Selenium.
In this article we’ll focus on the React side of things, and showcase part of the testing approach at HiredScore.
Here’s a question: if you had the constraint of picking just one of the common test layers you usually use with every feature, which one would you choose that would give you the most ROI if it is the only one that exists (return on investment)?
- Unit tests, with a good coverage
- Integration tests, visual regression
- End-to-end tests, cross-browser visual regression
What if I told you that it’s possible to write no test at all and get (3), (2) and most of (1)?
In fact, you’ll be writing a Storybook story, not a test. And if you already are in the very healthy habit of writing Storybook stories for your development and design handoff workflow — then you’d be writing no tests at all.
This means, you’ll have much more time on your hands to do proper TDD for domain logic!
The Testing Pyramid

The testing pyramid was a concept that got a limelight during the gold-rush of testing; years 2006 to 2009 gave birth to BDD (Behavior Driven Development), cucumber, modern and humane automated testing, and sparked the culture of testing that was getting a healthy boost from the Ruby community, which kept looking at software as craft and quality as a first-class citizen.
One example was Ruby on Rails and its massive opinionated push towards testing and test strategy and tooling right out of the box. Pretty much shaping everything we know about good testing today.
At the base of the pyramid we have our unit tests; small, quick, isolated tests that can run en-masse. As we go up, the complexity and run time of tests goes up as well, and so integration tests and then end-to-end tests come next, and then manual tests or the so called “eyeball tests” come last.
What’s important here is that as you go up — you should ideally write less tests of that certain level you went up to.
With that metaphor comes its arch-enemy — the Ice Cream Cone:

In this model, you have a massive amount of manual tests and close to zero unit tests. The worst kind of situation to be in for agility and reliability.
Introducing: The Testing Diamond

Having React coupled with Storybook and Storyshots, unlocks a different model: the Diamond model.
The diamond model for your UI/App means: little to zero unit tests, massive amount of integration tests, and zero manual tests.
What changed? Integration tests were avoided in the early days because they had a reputation of running slowly; granted — with most technologies this is still very true.
With Jest, React, and Storybook/Storyshots, this is (arguably) no longer the case. No longer must you bring up a browser for each test that leaves its traces in your test environment, or have flaky test suites run and fail randomly, using a not-so-smart test runner that forces you to run everything exactly when you didn’t want to. It’s an era where frontend tooling really does work, and hard becomes easy.
Redefining Integration Tests
Before we see how Storybook and friends checks all of our testing boxes, it makes sense to align our testing terminology in the context of React. A unit test may mean many different things to different people or different teams, and even more so integration tests may mean different things as well.
For example, I view a unit tests as something that tests a module in isolation — and I don’t really care about if that module is a class, a function or a set of highly cohesive classes that sit together in a module. Others might argue differently, which is fine.
I also view an integration test as anything that connects one or a number of such modules with the external world for a wide definition of “external world”. For example, rendering a single React component naively is a unit test in my book. But rendering that same component with various dependencies such as CSS, fonts, wrapper component, theme/styling support and so on (still just showing that single component) is an integration test — even if we don’t combine multiple components with one another, we are combining a single component with some infrastructure facilities — which are external to it.
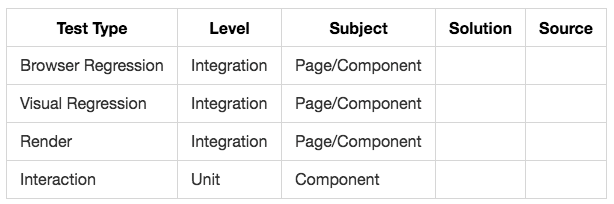
Let’s line up our solutions and keep track of this table as we go:
Storybook Driven Development

In a modern React workflow, you have Storybook integrated and driving your work. Which means you build a component storybook-first, in a storybook-driven-development fashion.
React components are largely a functional beast. They have inputs and outputs and no side effects. What this means is that for a process that takes an input and produces an output — the effective way to test would be to set up a test harness; something that takes a module (test subject), automatically provides input, runs the module and automatically verifies the output.
Jest snapshots is such a test harness. Jest snapshots in the context of Storybook are what Storyshots is.
Storyshots for Structural Tests
If you already write stories for every component, you already are writing tests, and you just don’t know it yet. Given the thesis above, each of your stories can automatically become a tests:
- Input is your story
- Processing is simply rendering a story (which storybook already does)
- Output is a generated snapshot
And this is what Storyshots does. Storyshots will verify that a React component renders correctly; and if you build multiple stories with a number of different properties then Storyshots can snapshot those as well, and those would be verified on every test run.
Storyshots and Puppeteer for Visual Tests
With Storyshots, we’ve covered the DOM. However, in some cases snapshots are not enough; these cases are often browser driven — an example would be an unexpected cascading (CSS) set of rules that step on each other, leading to a different rendering from what we expected.
Rendering a story to pixels is beneficial, especially when it too comes for free. With Storyshots Puppeteer this easily becomes the case.

Storyshots Cartesian for 10x Testing Impact
Now that we have three layers of defense ready to snapshot and use stories from your storybook set up, why not give it more stories? For example, looking at this component:
<Button disabled={false}
        highlighted={false}>
    Click Me
</Button>
Reveals that we have a few creative ways to verify that this button is correct:
- A button that’s disabled should look like it’s disabled
- Same for when it’s highlighted
- A button that has an empty text, should be still visible and look like a button (i.e. will not squash down to be one pixel wide), there should be some minimal width for it
And each of these can be a story. This works great because the moment we add a story, we have three snapshot tools that go off:
- “Regular” snapshots — take care of snapping the DOM
- Puppeteer snapshots — makes sure a browser renders correctly, visual regression
- Multibrowser snapshots — visual regression on old browsers, old IE, a combination of Mobile+Browser variants that your customers use frequently, and so on.
But, what about a combination of the stories? what about a button that’s highlighted and disabled?
For this, we employ Storybook Cartesian. With it, we can state the various single-property options for a prop, and it will generate all of the required combinations as fully functional stories; and so, these too will be immediately picked up by our multiple testing stages.
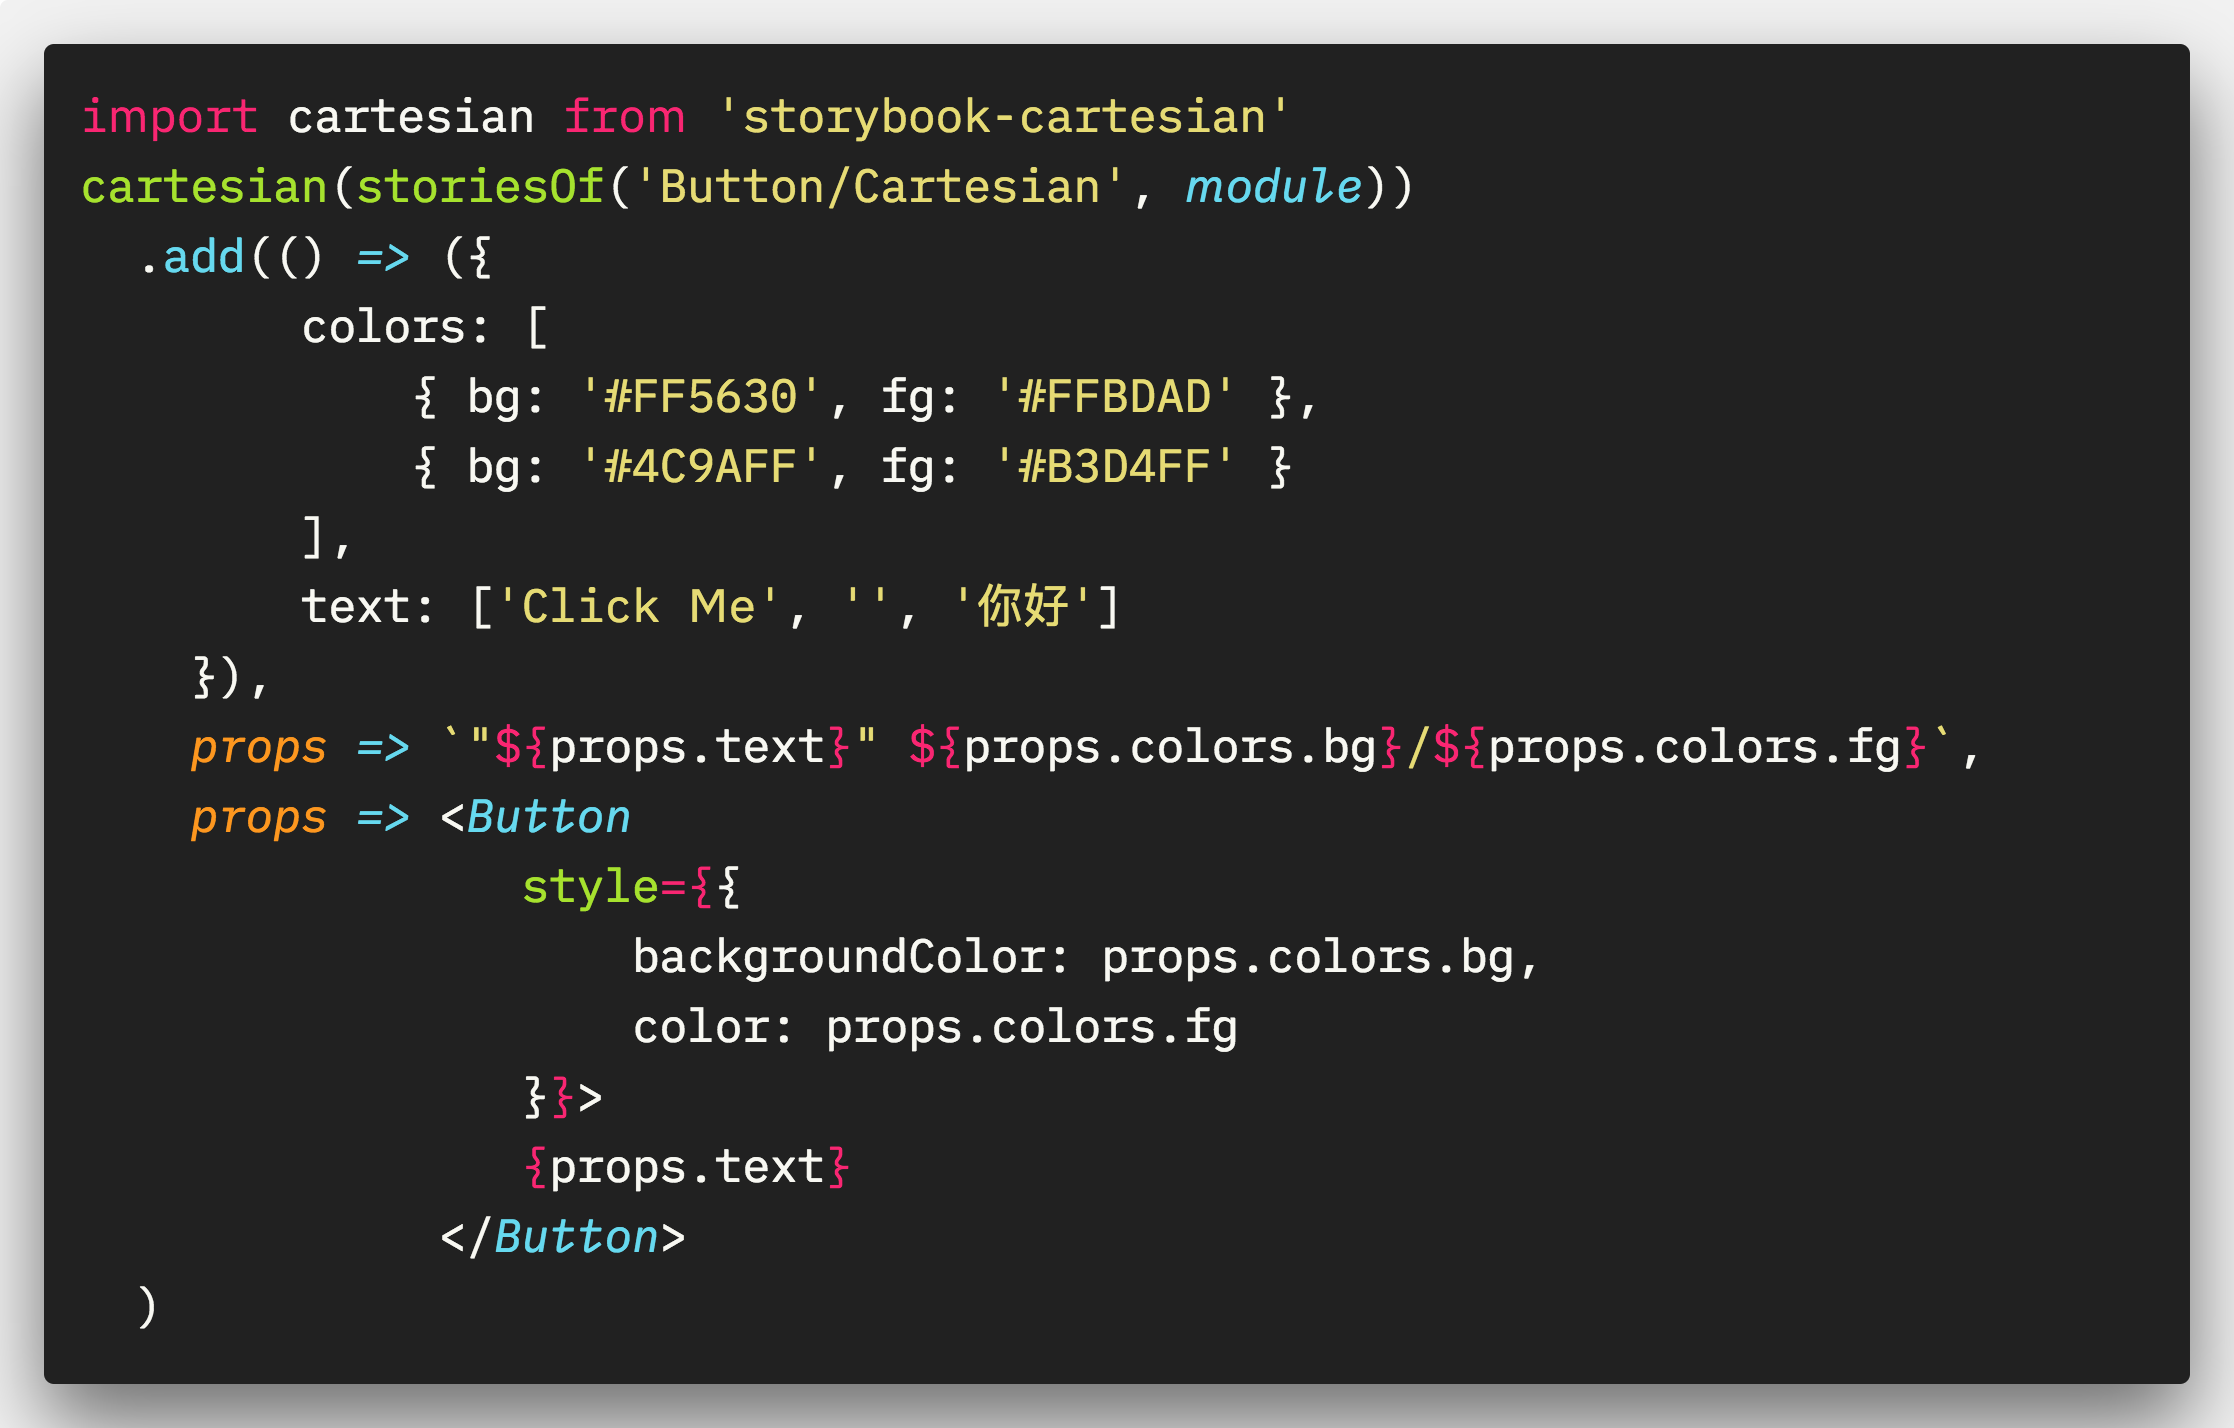
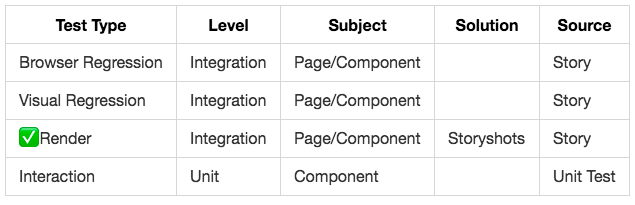
Which creates:
And the resulting table gets a little bit extra for everything!

Interaction Tests: The Lone Survivor
By using our existing stories and these techniques we’ve got a layers on top of layers of defense. What none of those cover is interaction tests and stateful tests, which you can now do sparingly and treat as an edge case and not the norm.
Conclusion
What do we lose by doing a little amount of unit tests but a great amount of integration test?
Well, on “paper” we lose the ability to pinpoint failing code very quickly. A unit test effectively splits our code to small units (when done right), and so when a test fails we should get a good intuition for what unit failed and what line of code was it that triggered the failure.
We don’t get that with integration tests, but if we think about React components, it doesn’t matter. In any case these are mostly rendering tests so even if we had such unit tests we would still ask a question that relates to rendering of a component — “what CSS did we get wrong?” or “what markup should we fix?”. In that sense — integration tests and snapshot tests are as effective in fixing a failing test as a unit test.
That said, you should definitely keep your “classic” unit tests for logic, library and domain model code. All these things you put in /lib, external packages that deal with your domain model and so on.
Using Flow or Typesript is another good thing you can do when doing this kind of testing. Null safety, and type errors kind of test failures would not even get a chance to become a failing test and so increases the effectiveness of a healthy integration layer.
As with anything, don’t apply these principles blindly to every situation — although it should work quite well in the context described (React components, rendering, views, browsers).